
Category: IT Knowledge Base Articles (Page 2 of 12)
Temporary Access Pass (TAP) in Microsoft 365
Enable TAP in Entra ID first:
- Entra admin center – Protection – Authentication methods
- Click Temporary Access Pass
- Set to Enabled, configure who can use it, set lifetime (default 1 hour, max 8 hours or 30 days for one-time use)
- Save
Create a TAP for a user:
- Entra admin center – Users – select the user ( https://entra.microsoft.com/ )
- Authentication methods
- Click Add authentication method
- Choose Temporary Access Pass
- Set duration and whether it’s one-time use
- Copy the code – you only see it once
How the user uses it:
- Go to outlook.com or sign in wherever you need to
- When prompted for a password, click “Sign-in options” – then “Temporary Access Pass”
- Enter the TAP code
- Once in, they set up their MFA method (Authenticator app, etc.)
Common use cases at an MSP:
- New employee first login
- User locked out / lost MFA device
- Migrating a user to a new device and need them to register fresh
Key notes:
- TAP bypasses MFA temporarily – treat it like a password
- One-time use TAPs expire after first login
- Reusable TAPs expire based on the time window you set
What We Do
Ultrex is a IT Service provider focused on small to mid-sized organizations that need dependable IT without hiring a full internal team. We provide:
- User IT support
- Cybersecurity and compliance (PCI/HIPAA/etc)
- IT Trainings- on things like AI, Email Security, cloud storage- anything IT related
- VoIP solutions
- Cloud services management
- Strategic IT planning and budgeting
We are proactive, user-focused, and relationship-driven. We do not just fix problems. We prevent ongoing issues and guide clients long term.

What Makes Someone a Good Fit
1. They Rely on Technology Daily
- 5 to 100 employees is ideal
- Use Microsoft 365, cloud apps, or Google Workspace (or want to)
- Businesses that operate M-F 8-5
- At least 3 Staff who work on computers primarily
2. They Feel IT Pain
- Weak response from current provider if on outsourced IT now
- In house staff wearing multiple hats, not true IT, just trying to make things work
- Reactive-only break-fix support (if they’re paying someone hourly, or having a non IT staffer muddle through it)
- Frequent outages or recurring issues
- No strategic IT plan
- Cost fluctuates with every ticket or call-in. Projects that cost extra
- Feeling like current IT is just trying to sell them machines and extra services
3. They Want a Partner, Not a Vendor
- Open to guidance
- Want structure, documentation, and standards
- Willing to listen to input and advice

Red Flags – Poor Fit
- Only want the cheapest option / Only talking about price
- Refuse to invest in themselves
- Need 24/7 or after hours support
- Everyone talks about needing fast response times, but when defined, is it within our SLA’s?
- Have changed IT providers more than 2 times in the last 5 years
- Have internal IT staff who see us as a threat instead of support
Questions to Ask
About Their Current Situation
- Who handles your IT today?
- What frustrates you most about your current setup?
- What gets in the way of your staff doing their best work?
- When was your last major outage?
- How do you handle cybersecurity today?
- Is there a machine that if it broke, you’d lose your efforts? Do you know for sure your backups are in a good spot?
- What sort of projects or changes would you want to do on if IT was a fixed cost?
- What would one day of downtime cost you? Is it worth spending money to proactively avoid that?

How to Position Ultrex
Lead with outcomes, not tools.
Instead of: “We provide managed IT.”
Say things like: “We help you minimize downtime, train and support your staff, and plan technology so it supports growth instead of slowing you down.”
Focus on:
- Flexibility (Not being one size fits all)
- Strategy
- Ease of mind- just having someone you can call, no added cost
- Long-term partnership

Closing Notes:
You are not selling just IT support.
You are selling peace of mind- business owners who don’t have to manage every piece, but can leave us to help their team.
The right client feels relief during the conversation.
The wrong client argues about price before understanding the offering.
Pricing starts at 100 per supported staffer per month. Multiplier of .5x – 2.5x depending on variables once we do the in-person sales visit. (To account for things like pending projects, staff IT comfort levels, legacy software, environment complexity etc).
We specialize in 501c3 NonProfits. Explain we are managed by a former church staffer who loves supporting nonprofits most, if you’re talking to one.
Find the pain. Quantify the risk. Position Ultrex IT as the proactive solution.
THE PROCESS:
Find potential new client
Go to www.Consulting.ultrex.com and book a 1 hour in person apt with me. Put in the client info, not yours, since they’ll get the confirmation and follow up emails. Make sure you put in the full address and contact info- since that’s where I’ll go, and the number I’ll call if there’s a cancellation or reschedule request. On the “what are we getting together for” line, it’s important you know the client gets what you put there. Please put a – and your initials at the end of the line, so I know what account rep booked the apt.
Then, I do my research based on the client email you provide. I’ll arrive on the day of the apt knowing all I can about the client so I can be of most use.
After the visit, I’ll write a bid, and send it to you to then present to the client. If you’d like me at the presentation meeting, just book me again. Do not commit to any timeline for onboarding, please leave all non-financial discussions between me and the client. The onboarding fee is at your discretion. Edits to the contract? Just email me and I’ll update and send you new ones as fast as possible.
If you paste this into admin powershell, it disables copilot inside of MS365 installed apps. Doesn’t change apps online, or the ability to use other AI’s, even copilot website, BUT it does block the copilot add on items in all installed office apps (Being used for PCA here shortly)
$regPath = “HKCU:\Software\Policies\Microsoft\office\16.0\common\officeai”
if (!(Test-Path $regPath)) { New-Item -Path $regPath -Force }
Set-ItemProperty -Path $regPath -Name “TurnOffCallout” -Value 1
$privacyPath = “HKCU:\Software\Policies\Microsoft\office\16.0\common\privacy”
if (!(Test-Path $privacyPath)) { New-Item -Path $privacyPath -Force }
Set-ItemProperty -Path $privacyPath -Name “disconnectedstate” -Value 2
If you want to rename a device in Atera without opening the device through cmd
click Manage dropdown
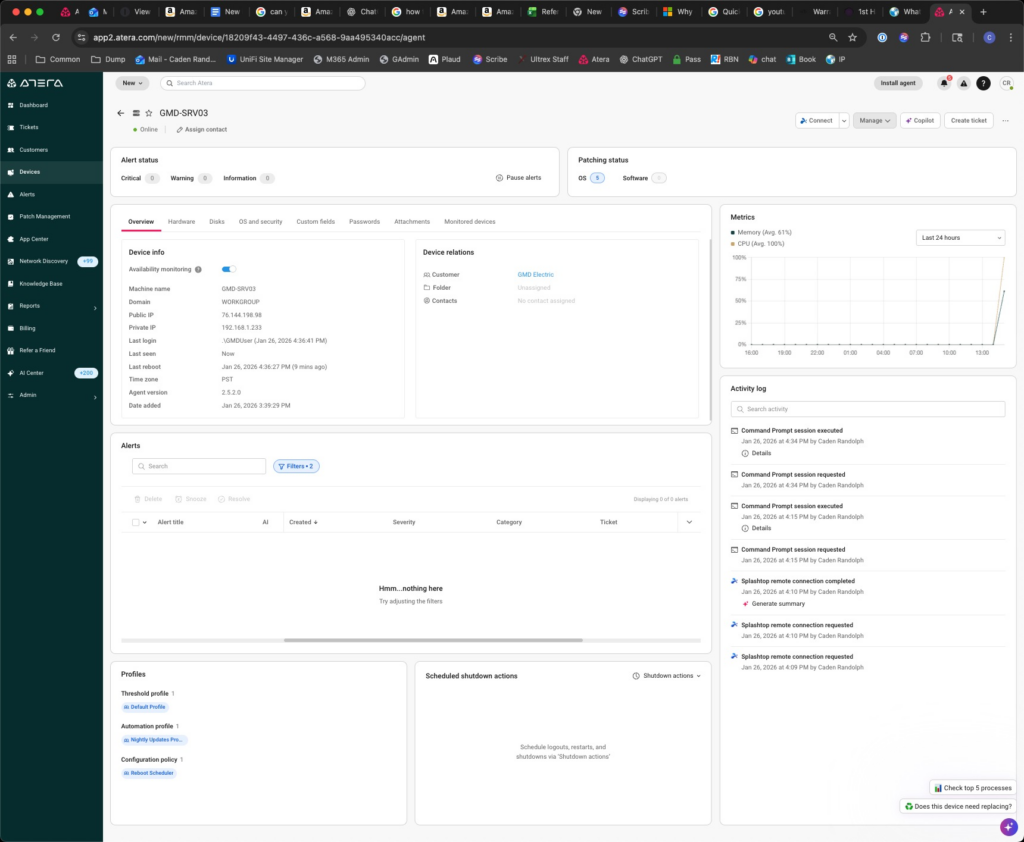
Click run as System command prompt
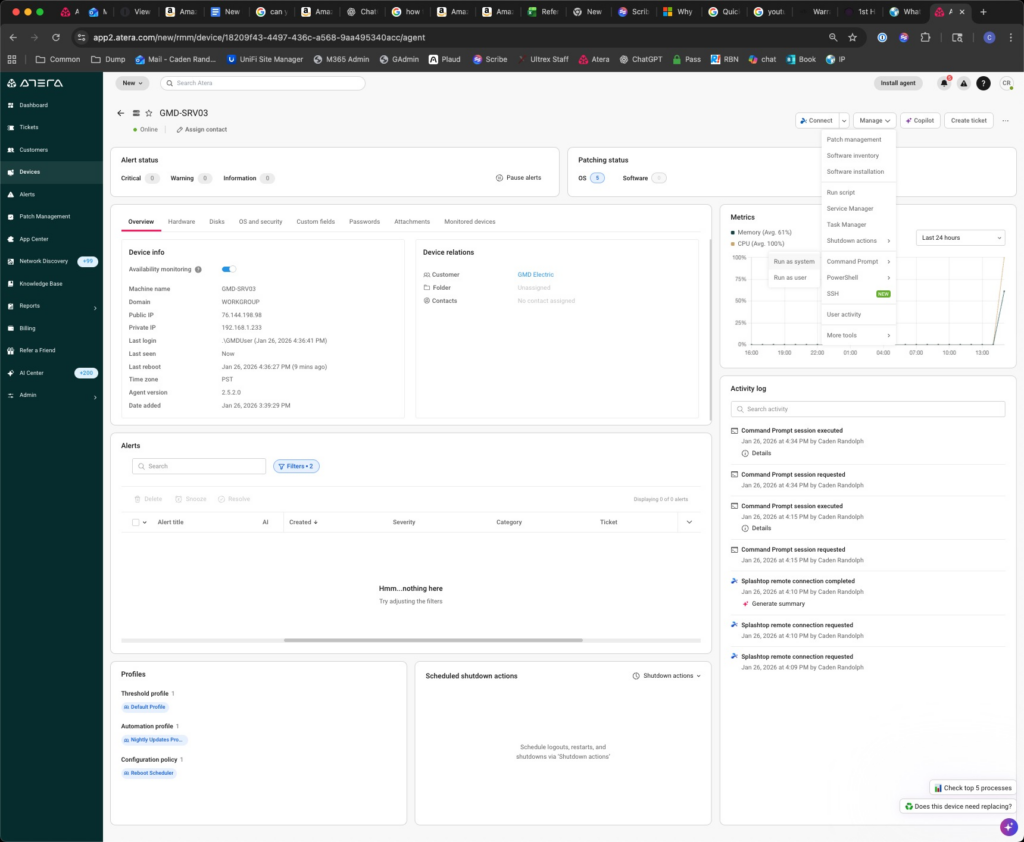
Type: wmic computersystem where name=”%COMPUTERNAME%” call rename name=”NEWCOMPUTERNAME”
Hit return
Type in the console shutdown /r /t 0
Hit return
Reload Atera after the computer has restarted the computer should be renamed
Fixing Blank “Save As” Dialog Window in Adobe Acrobat
Issue
From ticket #5088 – When using Save As in Adobe Acrobat, the dialog box may appear blank, preventing you from saving the file as another name in another location. This issue can occur on both Windows and macOS.
Cause
Adobe Acrobat attempts to “display online storage options” during the save process. A preference setting can cause the dialog to render incorrectly.
References
https://helpx.adobe.com/acrobat/kb/blank-save-as-dialog-mac.html
Resolution
Disable the online storage option in Acrobat:
- Open Adobe Acrobat Preferences
- Go to Edit > Preferences (Windows) or Adobe Acrobat > Preferences (macOS).
- Navigate to General Settings
- In the left-hand menu, select General.
- Disable Online Storage Option
- Locate:
Show online storage when saving files - Toggle this OFF.
- Locate:
- Restart Acrobat
- Close and reopen Adobe Acrobat to apply changes.
Alternate Workaround
If the issue persists or you need a quick alternative:
- Use Microsoft Print to PDF (Windows) or Print to PDF (macOS):
- From the print dialog, select the PDF printer option.
- Save the file manually after printing.
- Go to the location the file is saved in originally in File Explorer
- Copy and paste the file from that location into the destination folder path
Export Public Folder Calendar Events to a Shared Calendar in Outlook Classic
Overview
This guide explains how to export calendar events from a Public Folder in Outlook Classic (desktop app) and import them into a shared calendar using an .ics file.
Steps
- Open the Public Folder Calendar
- Launch the Outlook Classic desktop app.
- Navigate to the Public Folder calendar you want to export.
- Save the Calendar as an .ICS File
- Go to File > Save Calendar.
- Select the desired folder.
- (Optional) Set a date range for the events you want to export.
- Save the file in .ics format to your preferred location.
- Import Events into the Shared Calendar
- Open the destination shared calendar in Outlook Classic.
- Drag and drop the saved
.icsfile directly into the shared calendar. - All events from the Public Folder calendar will be imported.
Notes
- Ensure you have the necessary permissions for both the Public Folder and the shared calendar.
- Large calendars may take a few moments to process after import.
Resolving iPhone Sign-In Failures for Outlook & Teams After Tenant Migration
Purpose of This Article
- What this article aims to show you:
This guide explains how to resolve an issue where an iPhone refuses to sign into Outlook or Microsoft Teams after a Microsoft 365 tenant-to-tenant migration, even after reinstalling apps or resetting passwords. - When to use this information:
Use this process any time a migrated user’s iPhone cannot authenticate to Outlook/Teams, especially when:- Credentials are correct but apps repeatedly fail to sign in
- The old tenant’s identity is still cached on the device
- Standard app reinstalls do not fix the issue
This problem occurs because iOS stores stubborn Microsoft account caches that persist across reinstalls.
Step-by-Step Resolution Procedure
1. Use Microsoft Edge’s Hidden Reset Function (Most Effective Step)
This clears deeply embedded Microsoft account tokens that Outlook/Teams cannot remove themselves.
- Install Microsoft Edge from the App Store (temporary use only).
- Open Edge and in the URL bar enter:
edge://signin-internals - Tap RemoveAllAccounts.
- A red confirmation pop-up will appear—this is expected.
- Close Edge completely.
- Reinstall Outlook and Teams after completing all steps below.
Why this matters:
Edge exposes internal MSAL (Microsoft Authentication Library) caches that other Office apps cannot purge. Clearing this nearly always resolves post-migration authentication issues on iOS.
2. Remove Old Work Accounts from iOS System Settings
Even if the old work account isn’t showing in Outlook, iOS may still be storing it at the system level.
- Go to Settings → Mail → Accounts and delete any old work accounts.
- Also check under:
- Settings → Passwords & Accounts (older iOS versions)
- Settings → Apple ID → iCloud → Safari → temporarily disable Safari sync
- Go to Settings → Safari → Clear History and Website Data.
This flushes stored autofill credentials and account references that cause the sign-in loop.
3. Remove Old Accounts From Any Office App
If the user has Word/Excel/OneDrive installed, they may still hold the old tenant account.
- Open any Office app (Word, Excel, OneDrive, etc.).
- Tap the user’s profile icon (top left).
- Go to Settings → Storage Accounts.
- Swipe left on any old or incorrect accounts → Delete.
This removes the identity from Microsoft’s app-wide shared credential store.
4. Fully Reinstall the Apps After Clearing Credentials
Once the caches and accounts have been removed:
- Delete Outlook and Teams.
- Restart the iPhone (important reset of system caches).
- Reinstall the apps fresh from the App Store.
- Sign in with new tenant credentials.
At this point, authentication should succeed without referencing the old tenant.
Recap / Final Notes
This issue happens frequently after Microsoft 365 tenant migrations because iOS retains hidden Microsoft identity caches that aren’t cleared during normal reinstall procedures. Using Edge’s internal account purge, combined with removing accounts from iOS settings and Office app storage, ensures all legacy tenant tokens are removed.
Once all caches are cleared and the apps reinstalled, the user should be able to log into Outlook and Teams normally using their new tenant credentials.
If this process fails (rare), escalate internally before re-engaging Microsoft support—this procedure resolves the majority of cases.
Warranty Replacement Handling Procedure
Purpose of This Article
- What this article covers:
This document outlines the full internal process for handling warranty replacements for client equipment purchased through Ultrex IT. - When you should use this information:
Use this procedure any time a client requests a hardware replacement and it appears the device may fall under Ultrex’s 1-year warranty window. These steps ensure financial accuracy, proper inventory handling, and consistent tracking across teams.
Warranty Replacement Process
1. Confirm Warranty Eligibility
Before taking any action:
- Verify with leadership (typically [Name/Manager]) that the client is approved for a free warranty replacement.
- Confirm:
- The device was originally sold by Ultrex IT.
- The purchase date is within 1 year.
No replacement should proceed without this confirmation.
2. Have Brandi Process the Replacement Sale
Once approved:
- Contact Brandi to create a zero-cost sale for the replacement item.
- This ensures:
- Accurate billing records
- Proper documentation in the billing spreadsheet
- Do not manually remove or adjust inventory yourself yet.
3. Physically Perform the Replacement
- Swap out the defective/failed item with the new, zero-cost replacement.
- Collect the old device and return it to the office.
4. Tag the Returned Item
When bringing the old item back:
- Tag or label it clearly as:
“Bring-Back – Warranty Replacement – NON INVENTORY” - This ensures the item is not mistaken for active stock.
5. Test the Returned Item
Once tagged:
- Evaluate whether the returned hardware:
- Still functions
- Has partial functionality
- Can be used internally
- Holds any salvage or resale value
Document basic findings if needed.
6. Get Approval for Final Inventory Handling
After testing:
- Check back with leadership (same approval point as Step 1) with results of the test.
- They will determine whether the unit should be:
- Added back to usable internal inventory
- Stored for parts
- Recycled/disposed
- Otherwise tracked as non-inventory equipment
Do not add anything back into inventory without confirmation.
Final Notes
Warranty replacements must follow this workflow to maintain proper billing, inventory accuracy, and accountability. Always secure approval before starting, ensure Brandi logs the zero-cost transaction, and tag returning hardware appropriately. Clear communication and documentation at each step prevent inventory errors and unexpected costs.
Thanks for following this process!