Configuring Third-Party OATH TOTP Applications for Multi-Factor Authentication
This guide provides instructions for enabling and configuring third-party authenticator apps (such as Google Authenticator or Authy) as a secondary sign-in method for Microsoft 365 accounts through Entra. This is an alternative for users who prefer not to use the Microsoft Authenticator app.
Target Audience: This document includes both administrative configuration steps (for IT staff) and end-user setup instructions.
Before users can add a third-party app, the Microsoft Entra ID tenant must be configured to allow “Software OATH tokens.”
1. Enable OATH Tokens
Log in to the Microsoft Entra admin center.
Navigate to Protection > Authentication methods > Policies.
Select Software OATH tokens.
Set the Enable toggle to On.
In the Target tab, select the appropriate groups or All users.
Click Save.
2. Resolving “Missing Link” Issues
If users report they cannot see the option for “Different authenticator app,” check the following settings:
Registration Campaign:
Navigate to Authentication methods > Registration campaign.
If state is set to Microsoft Managed, Microsoft may hide other options to force the use of the Microsoft app. Consider just setting to “Enabled” or adding an exclusion for specific users during setup.
System-preferred MFA:
Navigate to Authentication methods > Settings.
If enabled, Entra ID will automatically skip selection screens to prompt for the most secure method found. This is preferred to leave enabled to make sure strongest MFA method is selected, but if it causes issues, switch to “Disabled”
To add a user to the Hyper-V Administrators group, you must already have administrative privileges on the host machine. This process allows standard users to manage virtual machines without giving them full system administrator access.
(Replace “UserName” with the actual account name or “Domain\UserName” for domain accounts).
Option 2: Use Command Prompt
Run Command Prompt as an Administrator and use this syntax:
cmd
net localgroup “Hyper-V Administrators” “UserName” /add
Note: Group names are localized; if your Windows installation is not in English, use net localgroup to find the exact name of the Hyper-V group on your system.
Option 3: Use Computer Management (Graphical)
This is the most common method for Windows 10, 11, and Windows Server users.
If someone shared a SharePoint Excel file with you — through a link, a Teams message, or an email — you might find yourself navigating through your browser every time you need to open it. This guide shows you how to create a desktop shortcut that opens the file directly in the Excel desktop app, with full editing and co-authoring support.
Before you start
Make sure you have:
Microsoft Excel installed on your computer (Microsoft 365 or Office 2016/2019)
Access to the shared SharePoint file — you should already be able to open it in your browseR
This guide is for Windows. The shortcut approach works best when you have the Excel desktop app installed — not just Excel Online in the browser.
Step 1: Find your Excel installation path
Before creating the shortcut, confirm where Excel is installed on your machine.
Locate EXCEL.EXE on your computer
Open File Explorerand navigate to:C:\Program Files\Microsoft Office\root\Office16\
Look for EXCEL.EXEin that folder.
If it’s not there, try:C:\Program Files (x86)\Microsoft Office\root\Office16
Alternatively, search for Excel in the Start menu, right-click it, and choose Open file location to find the exact path.
Step 2: Get the direct SharePoint file URL
This is the most important step. You need the direct file path — not a sharing link. Sharing links (which look like sharepoint.com/:x:/s/…) don’t reliably open in Excel desktop and may open read-only.
Open the file and copy its direct path
Open the shared file in your browser using whatever link you were given.
In Excel Online, clickFilein the top-left corner.
At the bottom of the menu, click“Open in Desktop”to launch the file in the Excel desktop app.
Once open in Excel desktop, click File → Info.
You will see the SharePoint path listed at the top of the Info page. Click Copy Path.
ClickNext, give the shortcut a friendly name (e.g.2026 Budget), then clickFinish.
The second screen of the Create Shortcut wizard — give it a clear name and click Finish.
Both the Excel path and the SharePoint URL must each be wrapped in their own set of quotation marks, with a space between them. Missing quotes are the most common cause of this not working.
Step 4: Test it
Double-click your new shortcut. Excel should launch and open the file directly — no browser, no “Open in Desktop App” prompt. The file should open in edit mode with AutoSave enabled in the top-left corner.
If AutoSave is toggled on in the top-left of Excel, you’re in full co-authoring mode. Any colleagues who open the file at the same time will see your changes in real time.
Troubleshooting
The file opens as read-only
This usually means a sharing link was used instead of the direct file path. Go back to Step 2 and make sure you’re copying the path from File → Info inside the Excel desktop app — not from the browser address bar. If a yellow “Read-Only” banner appears, click Edit Workbook on that banner to unlock it for that session.
Excel can’t connect to the URL
The URL copied from the browser address bar may contain ?web=1 or be in a _layouts/15/Doc.aspx format — both are browser-only URLs that Excel cannot open directly. Use the path from File → Info inside Excel desktop instead.
The file opens in the browser instead of Excel
Make sure both paths in the shortcut target are surrounded by their own quotation marks. A missing quote will cause Windows to misread the command and fall back to opening the URL in your default browser.
Excel isn’t at the Office16 path
Press Win + S, type Excel, right-click the result, and choose Open file location to find the exact path to EXCEL.EXE on your machine.
Co-authoring: working on the file with others
Once the file is stored on SharePoint and everyone opens it using the direct path (like the shortcut you just created), co-authoring happens automatically. You’ll see a colored cursor for each person editing simultaneously, and changes sync in real time — no manual saving needed.
For co-authoring to work smoothly, make sure:
Everyone opens the file from SharePoint — not from a locally downloaded copy saved to their PC.
AutoSave is turned on in the top-left corner of Excel.
Everyone has edit permission to the file in SharePoint, not just view access.
Quick recap
✓Find your Excel path — usually C:\Program Files\Microsoft Office\root\Office16\EXCEL.EXE
✓Open the file in Excel desktop and copy the direct path from File → Info
✓Remove?web=1from the end of the URL if present
✓Create a new shortcut on your desktop with both paths in their own quotes
✓Double-click to open — AutoSave on means co-authoring is live
When a client uses Google Workspace and needs their team to access Shared Drives from Windows workstations, we use a standardized PowerShell deployment script. This article walks through what the script does, how to use it, and what the end-user experience looks like.
Prerequisites
Before running the script, make sure the following are in place:
Google Drive for Desktop must be installed on the workstation. Download it from https://dl.google.com/drive-file-stream/GoogleDriveSetup.exe and run it before launching the script. The script will check for the installation and exit if it’s not found.
Administrator access on the target machine. The script uses #Requires -RunAsAdministrator and will not run without elevation.
User accounts must already exist on the machine. The script reads existing profiles from C:\Users and lets you choose which ones to target.
What the Script Does
The script (Ultrex-Deploy-GoogleDrive.ps1) performs four steps:
Step 1: Verify Google Drive Installation
The script looks for C:\Program Files\Google\Drive File Stream\launch.bat. If it’s found, it moves on. If not, it displays the download link and exits so you can install it first and re-run.
Step 2: Configure Auto-Start
It adds a registry entry under HKLM\SOFTWARE\Microsoft\Windows\CurrentVersion\Run so that Google Drive File Stream launches automatically when any user signs in. If the entry already exists, it skips this step.
Step 3: Create the Launcher Script
A VBScript file is created at C:\InstallSharedDrive\LaunchGoogleDrive.vbs. This is the logic behind the desktop shortcut. When executed, it:
Checks if GoogleDriveFS.exe is already running.
If not, launches it via launch.bat and waits up to 30 seconds for the mapped drive to appear.
If the drive is mounted, it opens it in File Explorer.
If the drive isn’t available (user hasn’t signed in yet), it displays a popup with step-by-step sign-in instructions directing them to the system tray icon.
The drive letter is configurable — the script prompts you at the start (defaults to G:).
Step 4: Deploy Desktop Shortcuts
Two shortcuts are placed on each selected user’s desktop:
Create Shared Drive — Uses the batch file icon. Runs the VBScript launcher, which starts Google Drive if needed and opens the mapped drive letter. This is the primary shortcut for users who need to reconnect or access their Shared Drive.
Google Drive — Uses the Google Drive icon. Simply launches Google Drive for Desktop. Useful if a user just needs to start the app or access settings.
Both shortcuts are also placed in C:\Users\Default\Desktop so that any future user accounts created on the machine will automatically receive them on first login.
The Script
Copy the entire block below and paste it into the RMM PowerShell terminal.
powershell
# Ultrex IT - Google Drive Shared Drive Deployment

#Requires -RunAsAdministrator

# --- CONFIGURATION -----------------------------------------------------------

$DriveLetter = Read-Host "Enter drive letter (default: G)"
if ([string]::IsNullOrWhiteSpace($DriveLetter)) { $DriveLetter = "G" }
$DriveLetter = $DriveLetter.TrimEnd(":", " ").ToUpper()

Write-Host ""
Write-Host "Available user profiles:" -ForegroundColor Cyan
$allProfiles = Get-ChildItem "C:\Users" -Directory |
    Where-Object { $_.Name -notmatch '^(Public|Default|Default User|All Users)$' } |
    Select-Object -ExpandProperty Name

$i = 0
foreach ($p in $allProfiles) {
    $i++
    Write-Host "  $i. $p"
}
Write-Host ""
Write-Host "Enter user numbers separated by commas (e.g. 1,2,3)" -ForegroundColor Cyan
Write-Host "Or type 'all' to deploy to everyone" -ForegroundColor Cyan
$selection = Read-Host "Selection"

if ($selection -eq "all") {
    $TargetUsers = $allProfiles
} else {
    $indices = $selection -split "," | ForEach-Object { [int]$_.Trim() - 1 }
    $TargetUsers = @()
    foreach ($idx in $indices) {
        if ($idx -ge 0 -and $idx -lt $allProfiles.Count) {
            $TargetUsers += $allProfiles[$idx]
        }
    }
}

Write-Host ""
Write-Host "Deploying to: $($TargetUsers -join ', ')" -ForegroundColor Green
Write-Host "Drive letter: ${DriveLetter}:\" -ForegroundColor Green
Write-Host ""

# --- STEP 1: Install Google Drive for Desktop --------------------------------
Write-Host "--- Step 1: Google Drive for Desktop ---" -ForegroundColor Cyan

$driveExe = "C:\Program Files\Google\Drive File Stream\launch.bat"

if (Test-Path $driveExe) {
    Write-Host "  [OK]   Google Drive for Desktop found" -ForegroundColor Green
} else {
    Write-Host "  [FAIL] Google Drive for Desktop is NOT installed" -ForegroundColor Red
    Write-Host ""
    Write-Host "  Please install Google Drive for Desktop before running this script." -ForegroundColor Yellow
    Write-Host "  Download from: https://dl.google.com/drive-file-stream/GoogleDriveSetup.exe" -ForegroundColor Yellow
    Write-Host ""
    Read-Host "  Press any key to exit..."
    exit
}

Write-Host ""

# --- STEP 2: Ensure Google Drive auto-starts for all users -------------------
Write-Host "--- Step 2: Auto-Start Configuration ---" -ForegroundColor Cyan

$runKey = "HKLM:\SOFTWARE\Microsoft\Windows\CurrentVersion\Run"
$existing = Get-ItemProperty $runKey -Name "GoogleDriveFS" -ErrorAction SilentlyContinue

if ($existing) {
    Write-Host "  [SKIP] Auto-start already configured" -ForegroundColor Yellow
} else {
    try {
        New-ItemProperty -Path $runKey -Name "GoogleDriveFS" `
            -Value """C:\Program Files\Google\Drive File Stream\launch.bat""" `
            -PropertyType String -Force | Out-Null
        Write-Host "  [OK]   Auto-start enabled for all users" -ForegroundColor Green
    } catch {
        Write-Host "  [WARN] Could not set auto-start: $($_.Exception.Message)" -ForegroundColor Yellow
    }
}

Write-Host ""

# --- STEP 3: Create the launcher VBScript ------------------------------------
Write-Host "--- Step 3: Creating Launcher Script ---" -ForegroundColor Cyan

$launcherDir = "C:\InstallSharedDrive"
$launcherScript = "$launcherDir\LaunchGoogleDrive.vbs"

if (-not (Test-Path $launcherDir)) {
    New-Item -Path $launcherDir -ItemType Directory -Force | Out-Null
}

$vbsContent = @"
Set objShell = CreateObject("WScript.Shell")
Set objFSO = CreateObject("Scripting.FileSystemObject")

' Check if Google Drive is already running
Set objWMI = GetObject("winmgmts:\\.\root\cimv2")
Set colProcesses = objWMI.ExecQuery("SELECT * FROM Win32_Process WHERE Name = 'GoogleDriveFS.exe'")

If colProcesses.Count = 0 Then
    driveExe = "C:\Program Files\Google\Drive File Stream\launch.bat"
    If objFSO.FileExists(driveExe) Then
        objShell.Run """" & driveExe & """", 0, False
        WScript.Sleep 5000
        attempts = 0
        Do While Not objFSO.DriveExists("${DriveLetter}:") And attempts < 25
            WScript.Sleep 1000
            attempts = attempts + 1
        Loop
    Else
        MsgBox "Google Drive is not installed." & vbCrLf & "Please contact Ultrex IT support.", vbExclamation, "Google Drive"
        WScript.Quit
    End If
End If

If objFSO.DriveExists("${DriveLetter}:") Then
    objShell.Run "explorer.exe ${DriveLetter}:\"
Else
    MsgBox "Google Drive is not ready yet." & vbCrLf & vbCrLf & "To sign in:" & vbCrLf & "1. Look for the Google Drive icon in the system tray (bottom right)" & vbCrLf & "2. Click it and sign in with your Google account" & vbCrLf & "3. Once signed in, click this shortcut again" & vbCrLf & vbCrLf & "Need help? Contact Ultrex IT.", vbExclamation, "Google Drive"
End If
"@

Set-Content -Path $launcherScript -Value $vbsContent -Force
Write-Host "  [OK]   Launcher script created at $launcherScript" -ForegroundColor Green

Write-Host ""

# --- STEP 4: Deploy shortcuts ------------------------------------------------
Write-Host "--- Step 4: Deploying Desktop Shortcuts ---" -ForegroundColor Cyan

$iconPath = "C:\Program Files\Google\Drive File Stream\drive_fs.ico"
if (-not (Test-Path $iconPath)) {
    $found = Get-ChildItem "C:\Program Files\Google\Drive File Stream" -Filter "*.ico" -Recurse -ErrorAction SilentlyContinue | Select-Object -First 1
    if ($found) { $iconPath = $found.FullName }
}

$desktops = @()
foreach ($user in $TargetUsers) {
    $desktops += @{ Path = "C:\Users\$user\Desktop"; Name = $user }
}
$desktops += @{ Path = "C:\Users\Default\Desktop"; Name = "Default" }

foreach ($entry in $desktops) {
    $desktop = $entry.Path
    $displayName = $entry.Name

    try {
        if (-not (Test-Path $desktop)) {
            New-Item -Path $desktop -ItemType Directory -Force | Out-Null
        }

        Remove-Item "$desktop\Google Drive G.lnk" -Force -ErrorAction SilentlyContinue

        $wshShell = New-Object -ComObject WScript.Shell

        $shortcut = $wshShell.CreateShortcut("$desktop\Create Shared Drive.lnk")
        $shortcut.TargetPath = "wscript.exe"
        $shortcut.Arguments = """$launcherScript"""
        $shortcut.WorkingDirectory = $launcherDir
        $shortcut.Description = "Launch Google Drive and open ${DriveLetter}:\"
        $shortcut.IconLocation = "C:\Program Files\Google\Drive File Stream\launch.bat,0"
        $shortcut.Save()

        $shortcut2 = $wshShell.CreateShortcut("$desktop\Google Drive.lnk")
        $shortcut2.TargetPath = "C:\Program Files\Google\Drive File Stream\launch.bat"
        $shortcut2.Description = "Google Drive"
        if (Test-Path $iconPath) {
            $shortcut2.IconLocation = "$iconPath,0"
        }
        $shortcut2.Save()

        Write-Host "  [OK]   $displayName" -ForegroundColor Green
    } catch {
        Write-Host "  [FAIL] $displayName - $($_.Exception.Message)" -ForegroundColor Red
    }
}

Write-Host ""
Write-Host "=== Deployment Complete ===" -ForegroundColor Cyan
Write-Host ""
Write-Host "  Drive:      ${DriveLetter}:\" -ForegroundColor Gray
Write-Host "  Users:      $($TargetUsers.Count) + Default profile" -ForegroundColor Gray
Write-Host "  Auto-start: Enabled" -ForegroundColor Gray
Write-Host "  Launcher:   $launcherScript" -ForegroundColor Gray
Write-Host ""
Write-Host "  Each user must sign in to Google Drive on first use." -ForegroundColor Yellow
Write-Host "  They click the system tray icon and authenticate with their Google account." -ForegroundColor Yellow
Write-Host ""
Write-Host "  Ultrex IT - deployment complete" -ForegroundColor Cyan
How to Run It
Confirm Google Drive for Desktop is already installed on the target machine. If not, push the installer first via RMM or install it manually during a remote session.
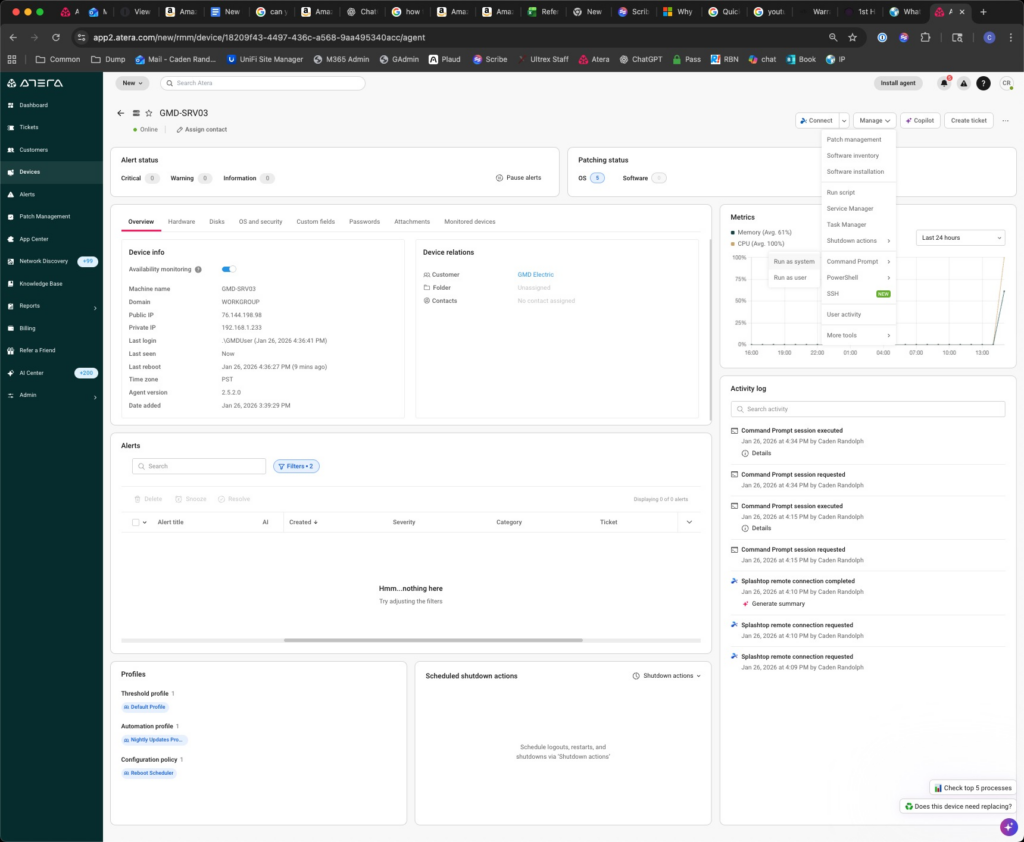
Open the RMM PowerShell terminal for the target device (e.g., Atera → Manage → Terminal → PowerShell).
Copy the entire contents of Ultrex-Deploy-GoogleDrive.ps1 and paste it into the RMM PowerShell session.
The script will prompt for two things directly in the terminal:
Drive letter — Press Enter to accept the default (G), or type a different letter if needed.
User selection — The script lists all user profiles on the machine. Enter the numbers separated by commas (e.g., 1,3,5,7) or type all to deploy to every profile.
The script runs through all four steps and reports success or failure for each user.
Example Session
Enter drive letter (default: G):
[Enter]

Available user profiles:
  1. anniek
  2. christinaw
  3. davec
  4. ginaa
  5. jamesa

Enter user numbers separated by commas (e.g. 1,2,3)
Or type 'all' to deploy to everyone
Selection: all

Deploying to: anniek, christinaw, davec, ginaa, jamesa
Drive letter: G:\

--- Step 1: Google Drive for Desktop ---
  [OK]   Google Drive for Desktop found

--- Step 2: Auto-Start Configuration ---
  [OK]   Auto-start enabled for all users

--- Step 3: Creating Launcher Script ---
  [OK]   Launcher script created at C:\InstallSharedDrive\LaunchGoogleDrive.vbs

--- Step 4: Deploying Desktop Shortcuts ---
  [OK]   anniek
  [OK]   christinaw
  [OK]   davec
  [OK]   ginaa
  [OK]   jamesa
  [OK]   Default

=== Deployment Complete ===
End-User Experience
After deployment, each user will see two new icons on their desktop. Here’s what their first-time experience looks like:
User signs in to Windows.
Google Drive for Desktop auto-launches (via the registry Run key).
The Google Drive system tray icon appears (bottom-right of the taskbar).
User clicks the “Create Shared Drive” shortcut on their desktop.
If they haven’t signed in to Google yet, a popup appears with instructions to click the system tray icon and authenticate with their Google account.
After signing in, the G: drive mounts automatically.
Clicking “Create Shared Drive” again opens G:\ in File Explorer.
From that point forward, Drive auto-starts on login, G: mounts automatically, and the shortcut just opens the drive.
Troubleshooting
Script exits immediately saying Google Drive is not installed Install Google Drive for Desktop first, then re-run the script. The installer can be downloaded from the URL shown in the error message.
Shortcuts appear but the drive letter never mounts The user needs to sign in to Google Drive. Have them click the Google Drive icon in the system tray and authenticate with their Google Workspace account.
Drive mounts as a different letter than expected Google Drive for Desktop assigns the drive letter automatically. If G: is already taken, it may use H: or another letter. You can re-run the script with the correct letter, or configure the drive letter in Google Drive’s settings (system tray icon → Preferences → Google Drive → Drive letter).
Shortcuts don’t appear for a new user account The script deploys to the Default profile, so new accounts should get the shortcuts automatically. If they don’t, re-run the script and select the new user.
If you paste this into admin powershell, it disables copilot inside of MS365 installed apps. Doesn’t change apps online, or the ability to use other AI’s, even copilot website, BUT it does block the copilot add on items in all installed office apps (Being used for PCA here shortly)
Fixing Blank “Save As” Dialog Window in Adobe Acrobat
Issue
From ticket #5088 – When using Save As in Adobe Acrobat, the dialog box may appear blank, preventing you from saving the file as another name in another location. This issue can occur on both Windows and macOS.
Cause
Adobe Acrobat attempts to “display online storage options” during the save process. A preference setting can cause the dialog to render incorrectly.
Export Public Folder Calendar Events to a Shared Calendar in Outlook Classic
Overview
This guide explains how to export calendar events from a Public Folder in Outlook Classic (desktop app) and import them into a shared calendar using an .ics file.
Steps
Open the Public Folder Calendar
Launch the Outlook Classic desktop app.
Navigate to the Public Folder calendar you want to export.
Save the Calendar as an .ICS File
Go to File > Save Calendar.
Select the desired folder.
(Optional) Set a date range for the events you want to export.
Save the file in .ics format to your preferred location.
Import Events into the Shared Calendar
Open the destination shared calendar in Outlook Classic.
Drag and drop the saved .ics file directly into the shared calendar.
All events from the Public Folder calendar will be imported.
Notes
Ensure you have the necessary permissions for both the Public Folder and the shared calendar.
Large calendars may take a few moments to process after import.
Resolving iPhone Sign-In Failures for Outlook & Teams After Tenant Migration
Purpose of This Article
What this article aims to show you: This guide explains how to resolve an issue where an iPhone refuses to sign into Outlook or Microsoft Teams after a Microsoft 365 tenant-to-tenant migration, even after reinstalling apps or resetting passwords.
When to use this information: Use this process any time a migrated user’s iPhone cannot authenticate to Outlook/Teams, especially when:
Credentials are correct but apps repeatedly fail to sign in
The old tenant’s identity is still cached on the device
Standard app reinstalls do not fix the issue This problem occurs because iOS stores stubborn Microsoft account caches that persist across reinstalls.
Step-by-Step Resolution Procedure
1. Use Microsoft Edge’s Hidden Reset Function (Most Effective Step)
This clears deeply embedded Microsoft account tokens that Outlook/Teams cannot remove themselves.
Install Microsoft Edge from the App Store (temporary use only).
Open Edge and in the URL bar enter: edge://signin-internals
Tap RemoveAllAccounts.
A red confirmation pop-up will appear—this is expected.
Close Edge completely.
Reinstall Outlook and Teams after completing all steps below.
Why this matters: Edge exposes internal MSAL (Microsoft Authentication Library) caches that other Office apps cannot purge. Clearing this nearly always resolves post-migration authentication issues on iOS.
2. Remove Old Work Accounts from iOS System Settings
Even if the old work account isn’t showing in Outlook, iOS may still be storing it at the system level.
Go to Settings → Mail → Accounts and delete any old work accounts.
Settings → Apple ID → iCloud → Safari → temporarily disable Safari sync
Go to Settings → Safari → Clear History and Website Data.
This flushes stored autofill credentials and account references that cause the sign-in loop.
3. Remove Old Accounts From Any Office App
If the user has Word/Excel/OneDrive installed, they may still hold the old tenant account.
Open any Office app (Word, Excel, OneDrive, etc.).
Tap the user’s profile icon (top left).
Go to Settings → Storage Accounts.
Swipe left on any old or incorrect accounts → Delete.
This removes the identity from Microsoft’s app-wide shared credential store.
4. Fully Reinstall the Apps After Clearing Credentials
Once the caches and accounts have been removed:
Delete Outlook and Teams.
Restart the iPhone (important reset of system caches).
Reinstall the apps fresh from the App Store.
Sign in with new tenant credentials.
At this point, authentication should succeed without referencing the old tenant.
Recap / Final Notes
This issue happens frequently after Microsoft 365 tenant migrations because iOS retains hidden Microsoft identity caches that aren’t cleared during normal reinstall procedures. Using Edge’s internal account purge, combined with removing accounts from iOS settings and Office app storage, ensures all legacy tenant tokens are removed.
Once all caches are cleared and the apps reinstalled, the user should be able to log into Outlook and Teams normally using their new tenant credentials.
If this process fails (rare), escalate internally before re-engaging Microsoft support—this procedure resolves the majority of cases.