
Enrolling Devices in Entra with Local Admin Privileges
Important Considerations
- Security: Ensure that only trusted users are added to the local administrators group to maintain device security.
- Audit: Regularly audit the membership of the local administrators group to ensure compliance with your organization’s policies.
- Documentation: Keep documentation of all changes made to user privileges for accountability and troubleshooting purposes.
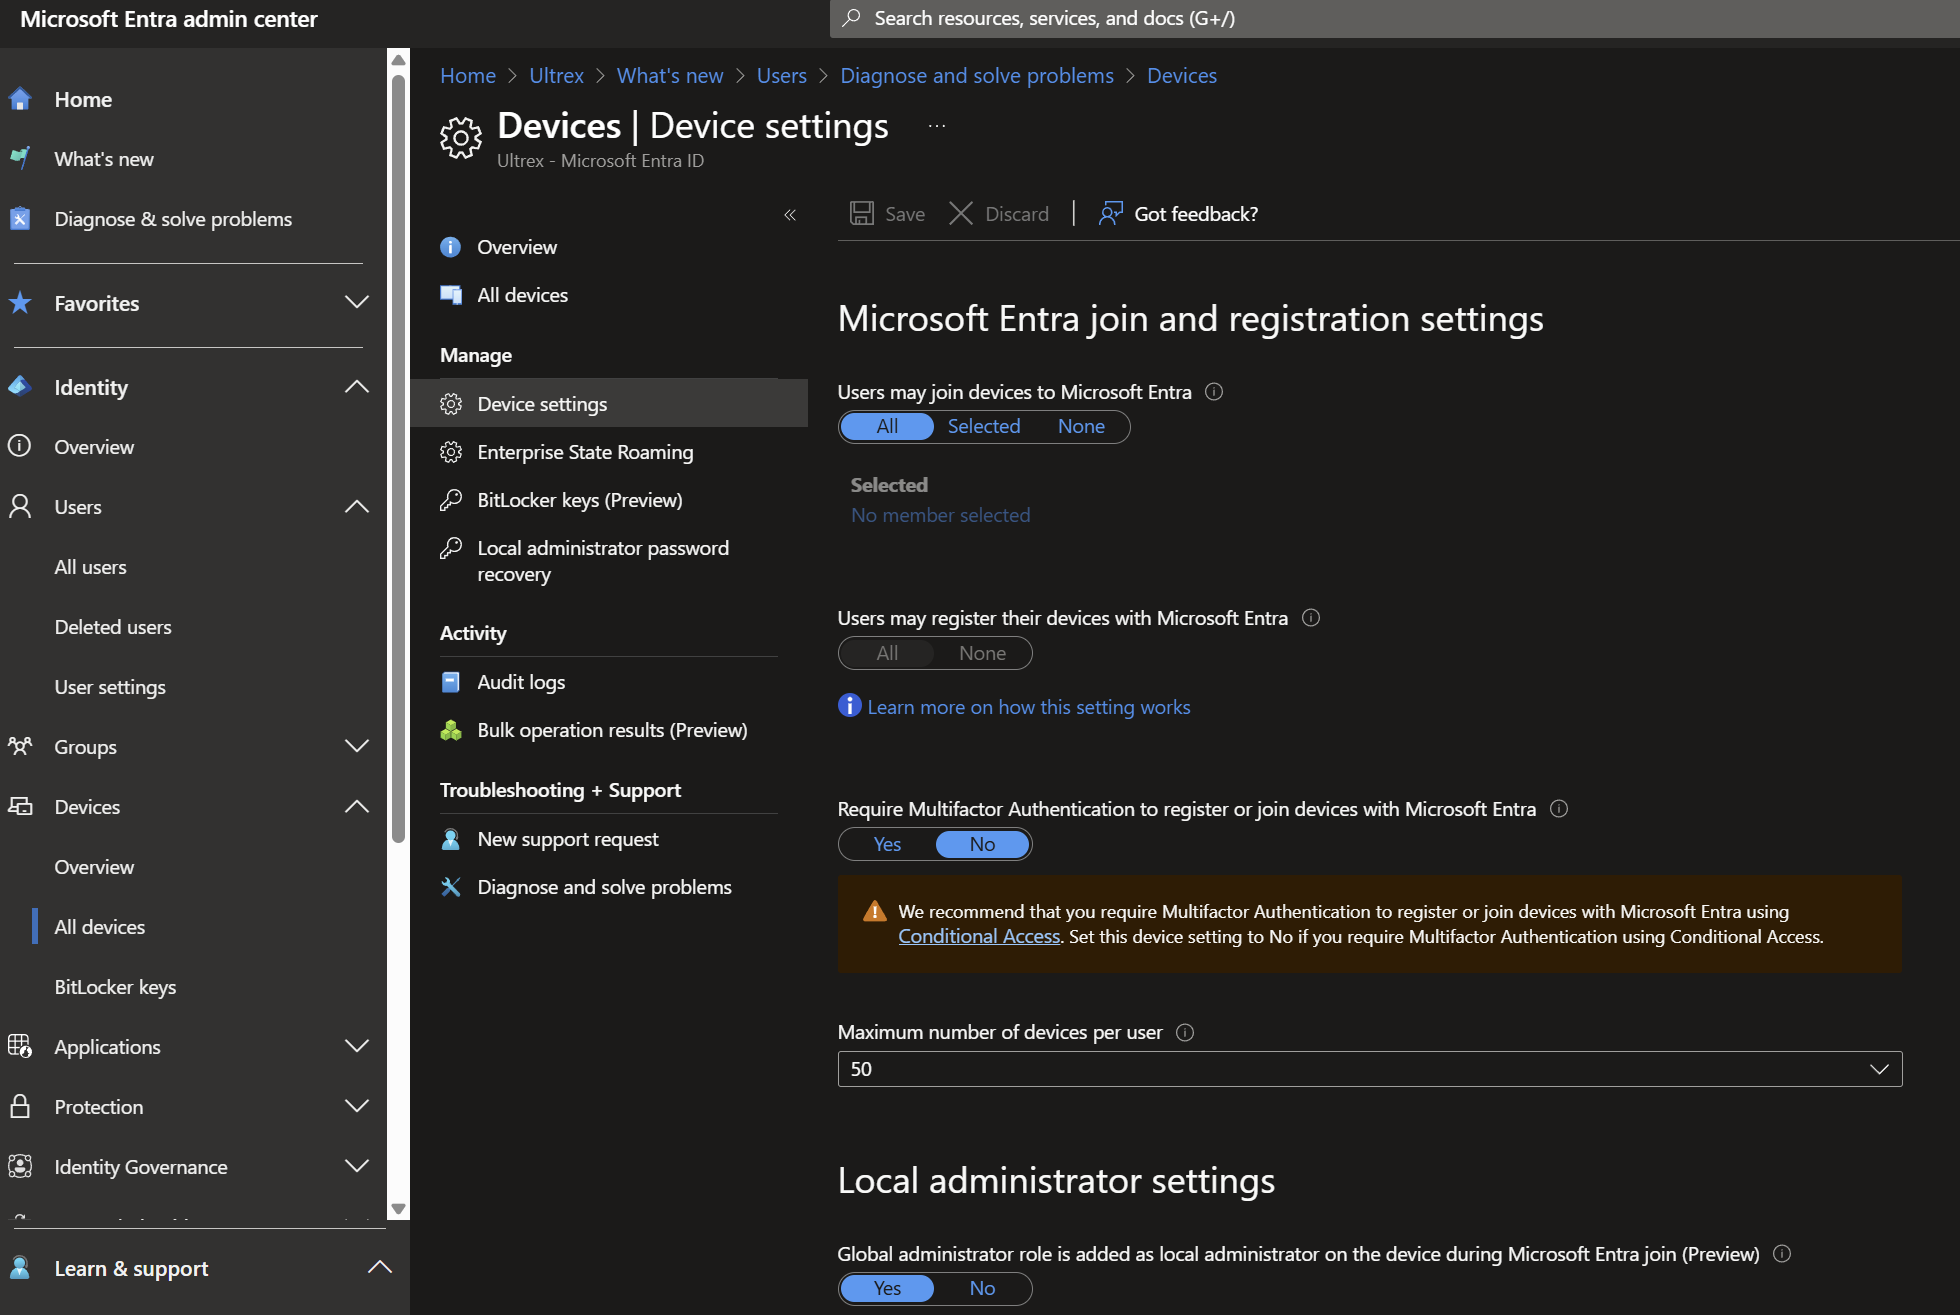
Common things that need Configured in Entra for Device Admin Privileges:- You can specify if global admins are allowed to be local device admins AT ENROLLMENT ONLY.
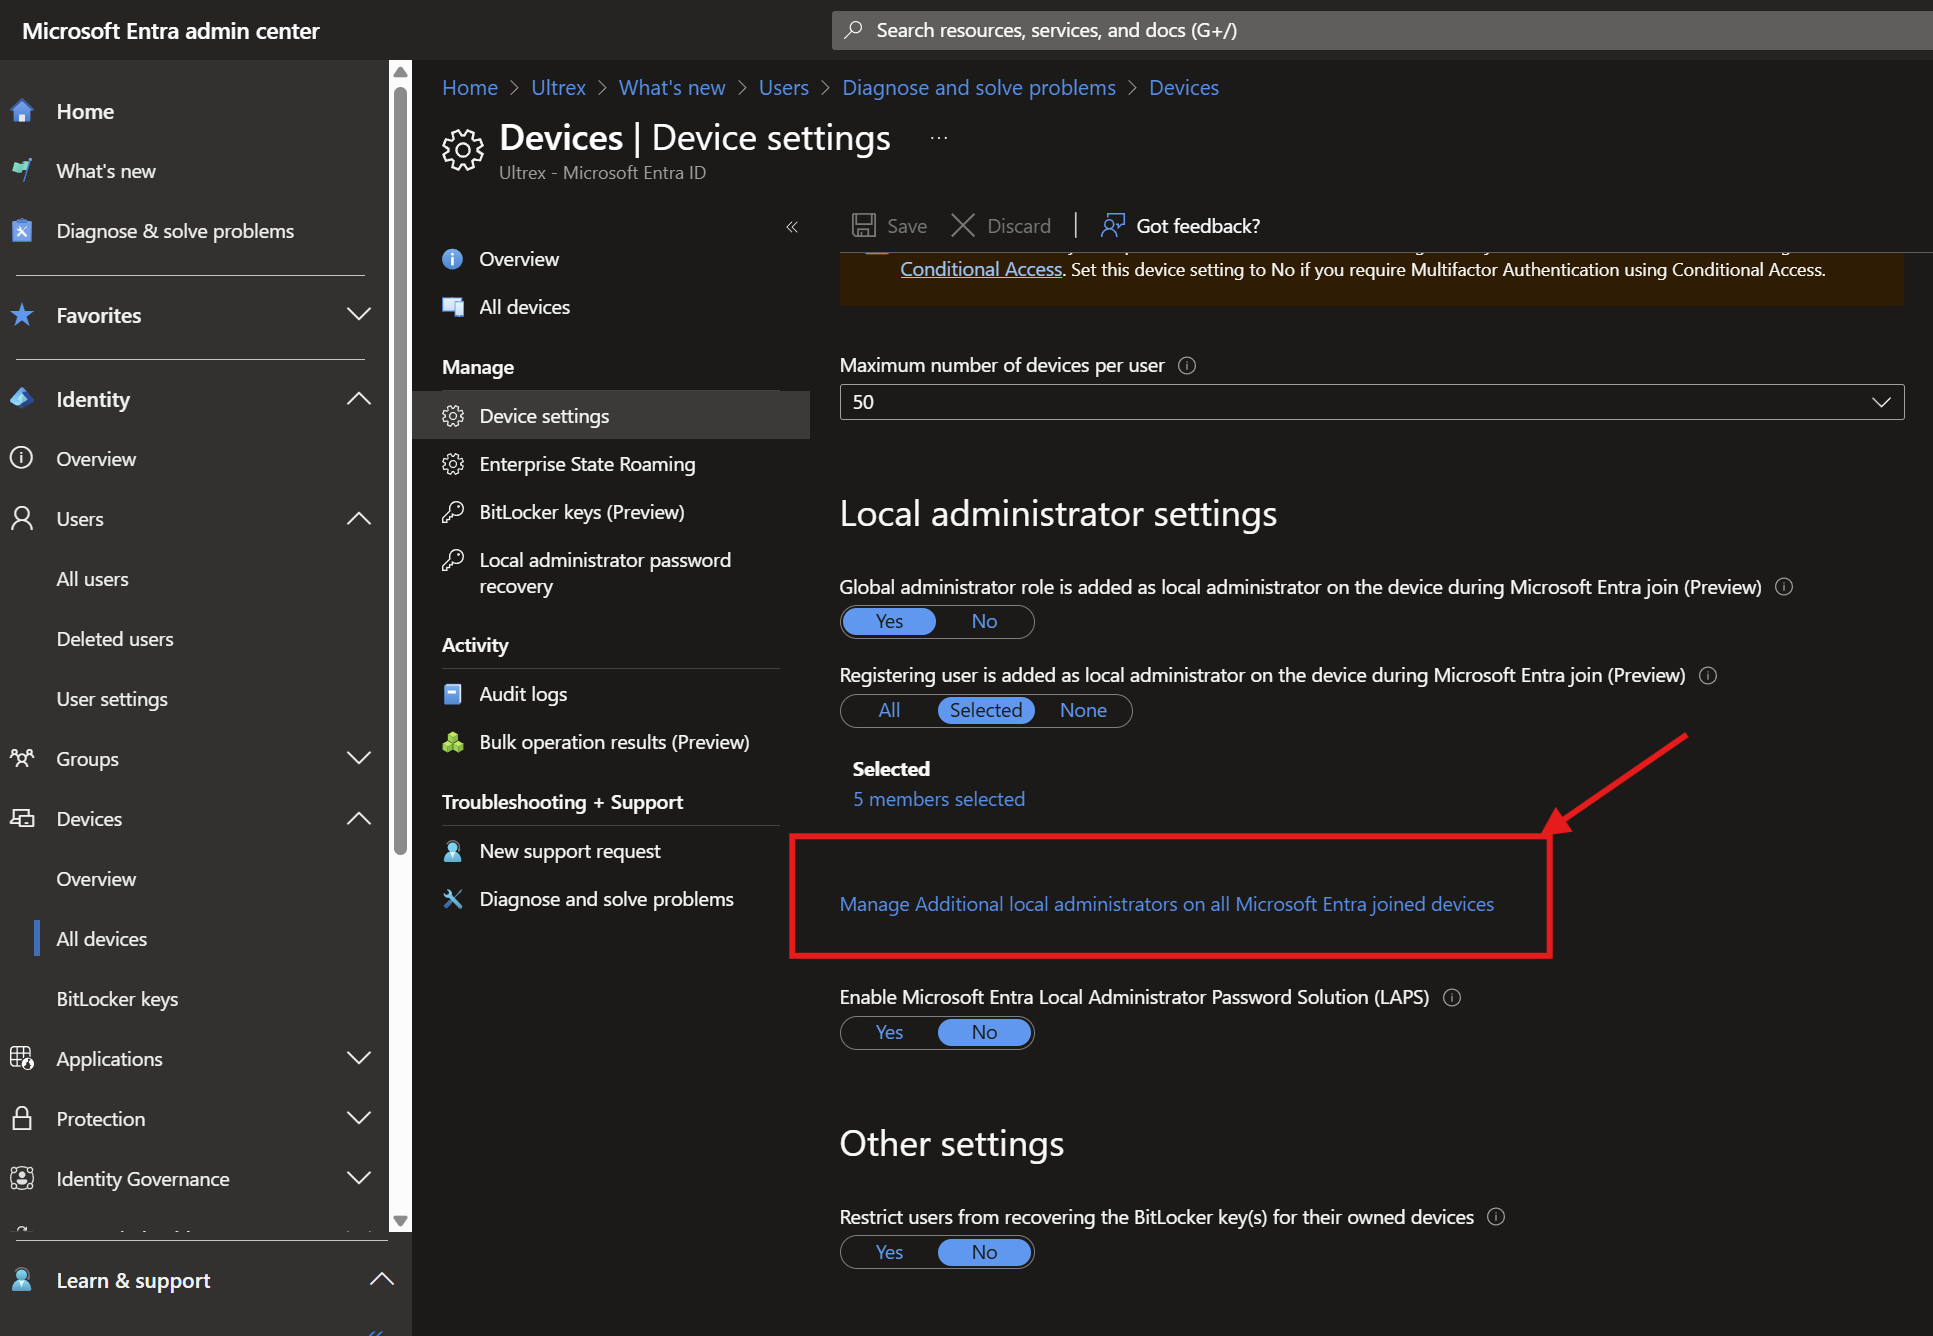
- You can and should specify if permitted Entra users are added as local admin AT ENROLLMENT ONLY. Add selected users.
- You can and should also add those same users from previous step the the next line – “Manage Additional local administrators on all Microsoft Entra joined devices.” That’s the key one to achieve the goal of key users having device admin privileges whether or not they have been signed into the device already.
- You can specify if global admins are allowed to be local device admins AT ENROLLMENT ONLY.
Entra Admin:
To enroll a user as a local device admin upon device enrollment in Microsoft Entra (formerly Azure AD), follow these steps:
1. Sign in to the Microsoft Entra Admin Center:
a. Go to the Microsoft Entra Admin Center.
b. Sign in with an account that has at least the Privileged Role Administrator role.
2. Navigate to Device Settings:
a. In the left-hand menu, select Identity > Devices > All devices > Device settings.
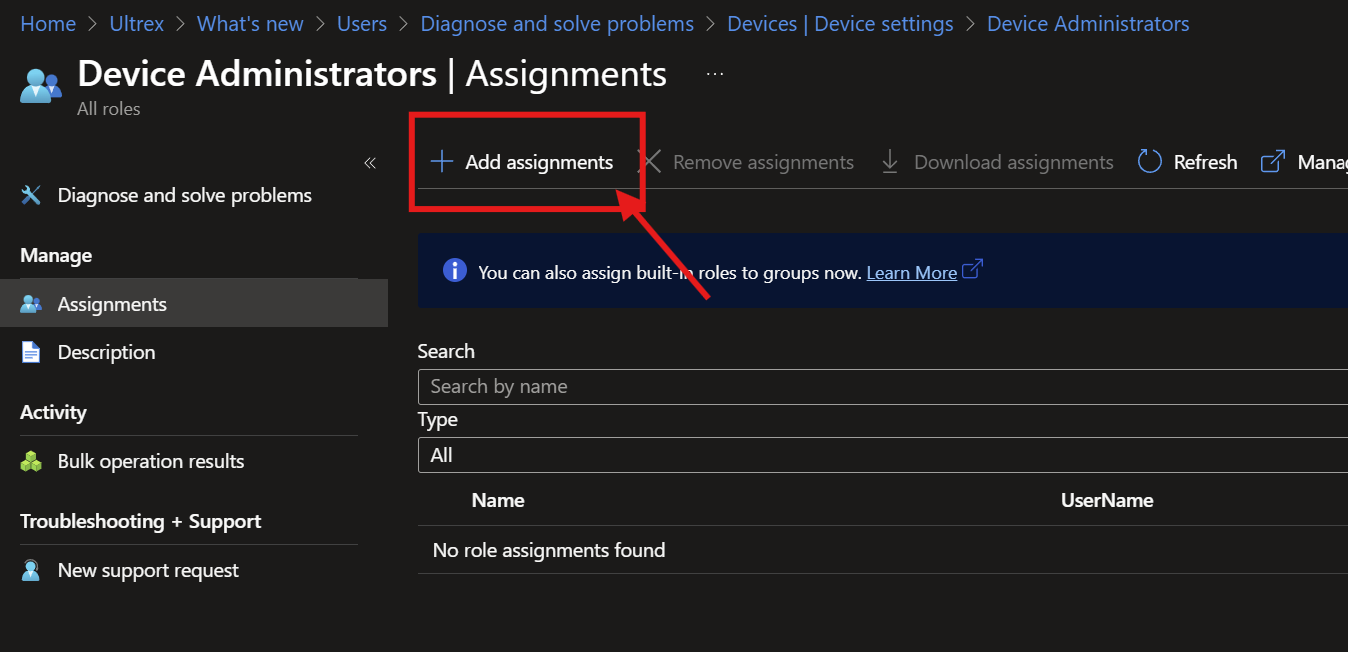
3. Manage Additional Local Administrators:
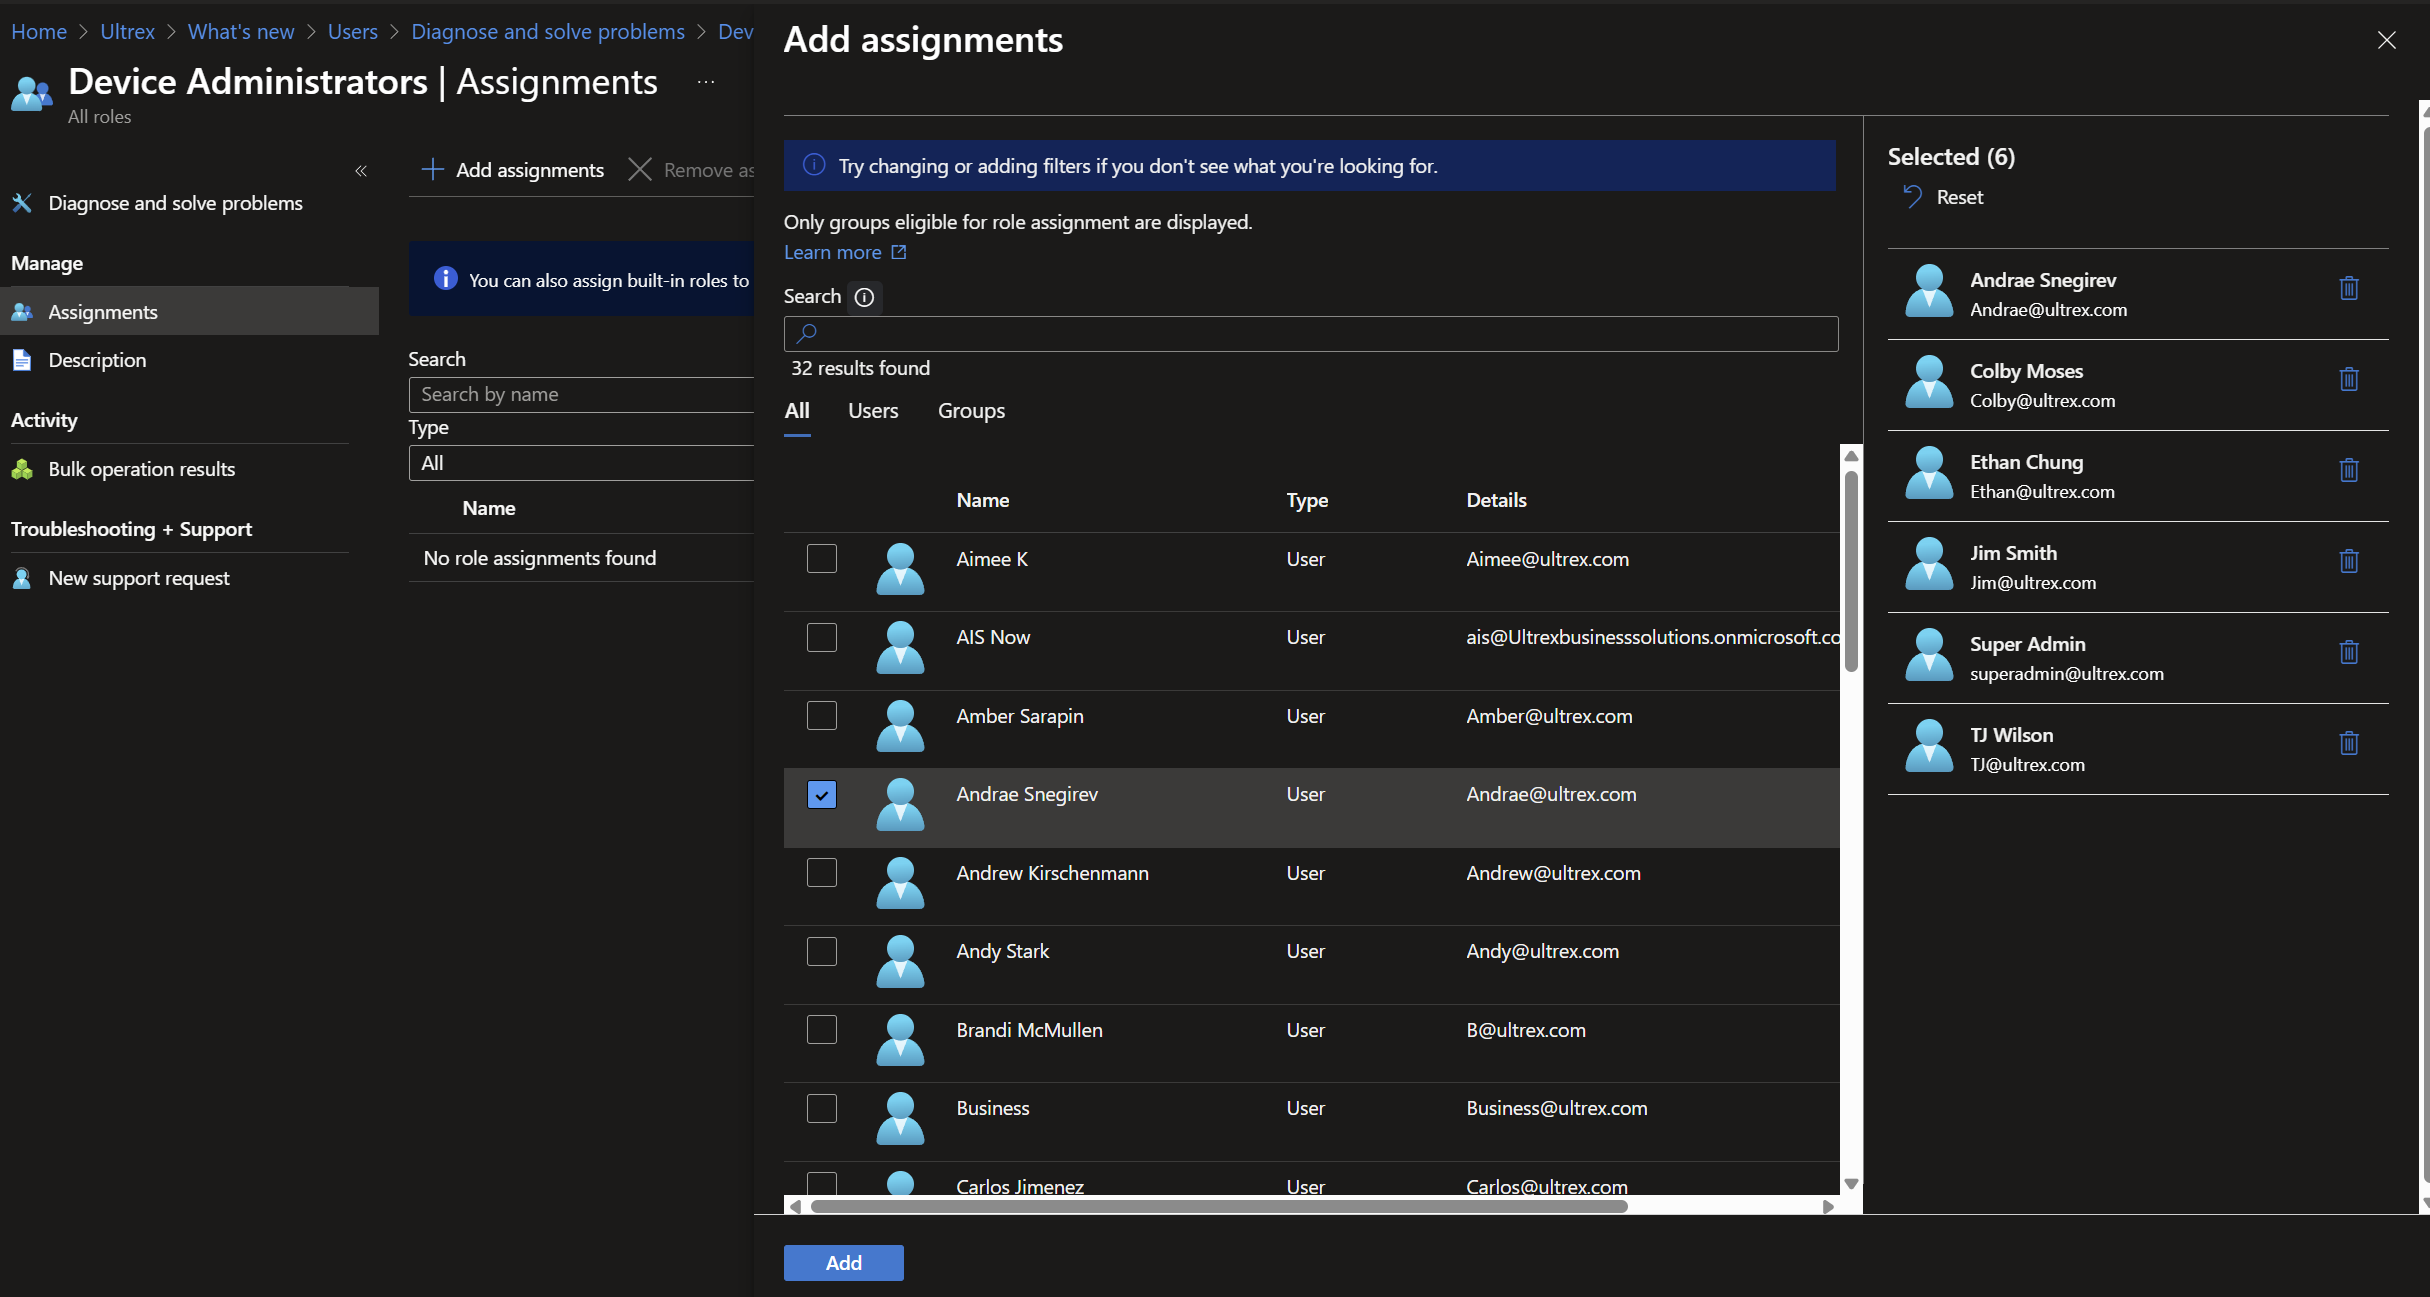
a. Under Manage Additional local administrators on all Microsoft Entra joined devices, click Add assignments.
b. Select the users or groups you want to add as local administrators and click Add.
c. Tests that verified this (based on CFM #3292)
I enrolled the laptop with an admin user (we’ll call this Admin 1; we’ll use ours for this often).
Signed into the laptop as a separate profile from Admin user with another account (Admin 2), which also had full admin permissions on the device according to Entra.
Signed into Non-Admin 1’s account which is NOT permitted admin rights over any PC, and could not perform admin level tasks.
From Non-Admin 1’s profile, tried installing a program and permitted installation using Admin 2’s authority successfully.
This one’s the kicker – without having signed into the PC with Admin 3’s account, but having given it local admin permissions for all devices through Entra as above without being a full Microsoft Global Admin like Ultrex’s user, I was able to permit removal of that same program from Non-Admin 1’s profile successfully.
4. Use Intune for More Granular Control:
a. If you need more granular control, you can use Intune to manage local admin rights.
b. Sign in to the Intune Admin Center.
c. Go to Endpoint Security > Account protection.
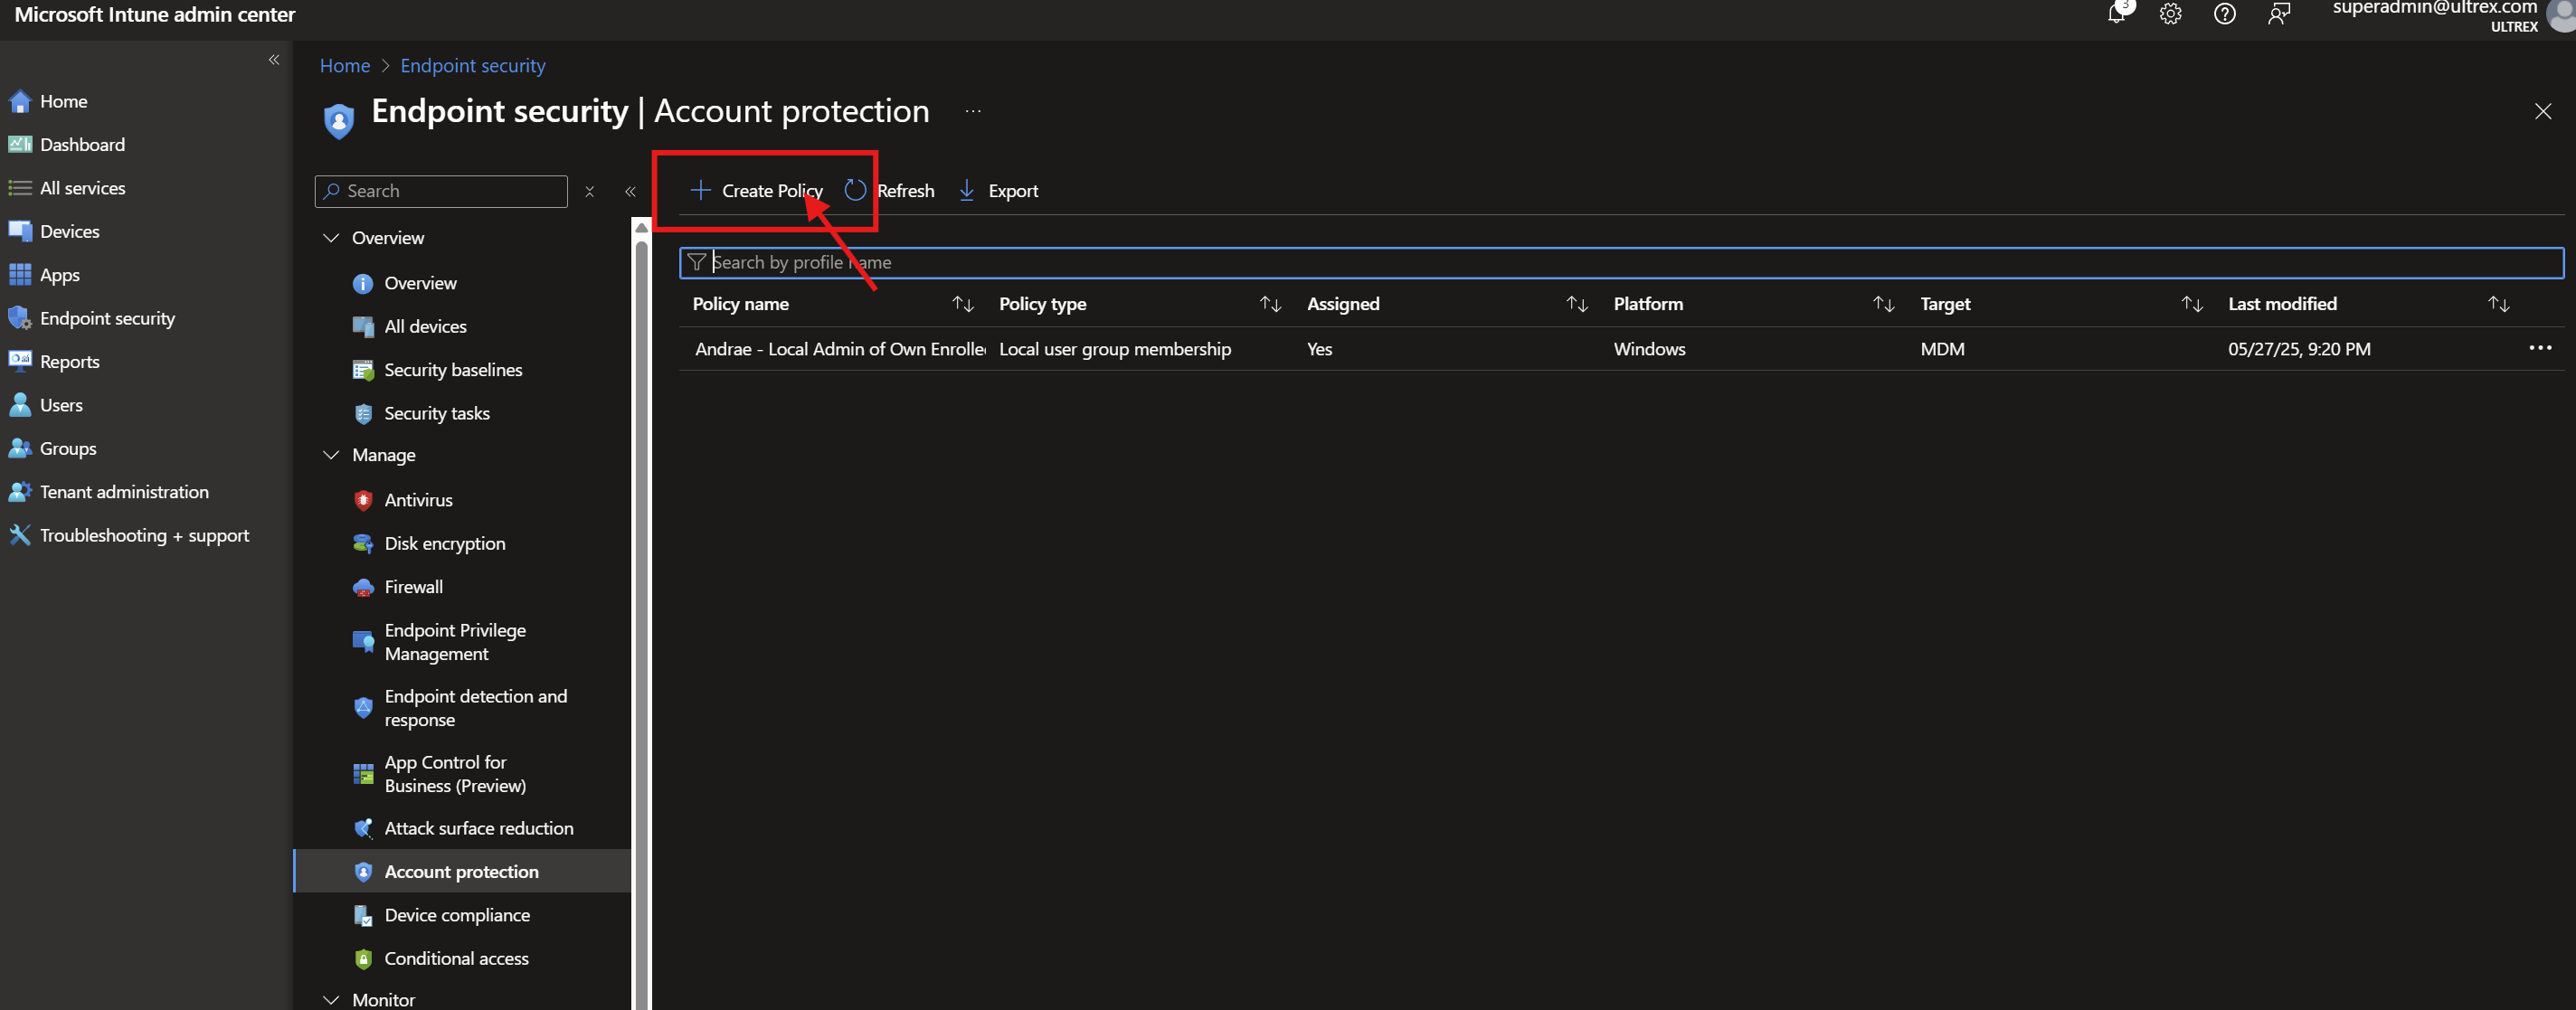
d. Click Create Policy and select Platform: Windows 10 and later and Profile: Local user group membership.
e. Configure the policy to add the desired users or groups to the local administrators group.
5. Assign the Policy:
a. Assign the policy to the relevant devices or user groups.
Important Notes for Assigning Policies:
In Microsoft Intune, policies are assigned to groups rather than directly to individual users or devices. However, you can achieve per-user or per-device targeting by creating a group that contains only the specific user or device you wish to target.
🎯 Assigning a Policy to a Single User or Device
- Create a Group for the User or Device:
- For a User:
- Navigate to the Microsoft Entra admin center.
- Go to Groups > New group.
- Choose Security as the group type.
- Provide a name (e.g., “Single User Group”) and description.
- Add the specific user to this group.
- For a Device:
- Similarly, create a new security group.
- Add the specific device to this group.
- For a User:
- Assign the Policy to the Group:
- In the Intune admin center, navigate to the policy you wish to assign.
- Go to the Assignments section and click “Edit“.
- Under Included groups, add the group you created.
- Save the changes.
By creating a group with only the desired user or device, the policy effectively targets just that entity.
🔍 Additional Considerations
- User vs. Device Groups:
- Assign policies to user groups when settings should follow the user across multiple devices.
- Assign to device groups when settings should apply regardless of who is using the device.
- Using Filters:
- Filters allow for more granular targeting within groups. For example, you can apply a policy only to devices with a specific OS version or tag.Microsoft Learn+2Microsoft Learn+2Microsoft Learn+2
- Policy Sets:
- For deploying multiple policies and applications together, consider creating a Policy Set. This groups various configurations into a single assignment for streamlined deployment.
Command Line
Check Users currently listed in the local admin group
Steps:
- Open Command Prompt as Administrator:
- Right-click on the Start menu and select “Command Prompt (Admin)” or “Windows PowerShell (Admin)”.
- Run the Command:
- Enter the following command
net localgroup administrators
Remove AzureAD User from Admin Group
Steps:
- Open Command Prompt as Administrator:
- Right-click on the Start menu and select “Command Prompt (Admin)” or “Windows PowerShell (Admin)”.
- Run the Command:
- Enter the following command, replacing user@domain.com with the actual email address of the AzureAD user:
net localgroup administrators /delete "AzureAD\user@domain.com"
- Restart the Device:
- Restart the device to apply the changes.
Add AzureAD User to Admin Group Through Command Line
Steps:
- Open Command Prompt as Administrator:
- Right-click on the Start menu and select “Command Prompt (Admin)” or “Windows PowerShell (Admin)”.
- Run the Command:
- Enter the following command, replacing user@domain.com with the actual email address of the AzureAD user:
net localgroup administrators /add "AzureAD\user@domain.com"
- Restart the Device:
- Restart the device to apply the changes.
Graphical Interface:
To remove an Azure AD user from the local administrators group on a Windows machine, follow these steps:
1. Open Computer Management:
a. Press Windows + X and select Computer Management.
b. Alternatively, you can press Windows + R, type compmgmt.msc, and press Enter.
2. Navigate to Local Users and Groups:
a. In the Computer Management window, expand Local Users and Groups.
b. Click on Groups.
3. Open Administrators Group:
a. Double-click on Administrators to open the group properties.
4. Remove the Azure AD User:
a. In the Administrators Properties window, you will see a list of members.
b. Select the Azure AD user you want to remove and click Remove.
c. Confirm the removal if prompted.
5. Restart the Computer (if necessary):
a. Some changes might require a restart to take effect